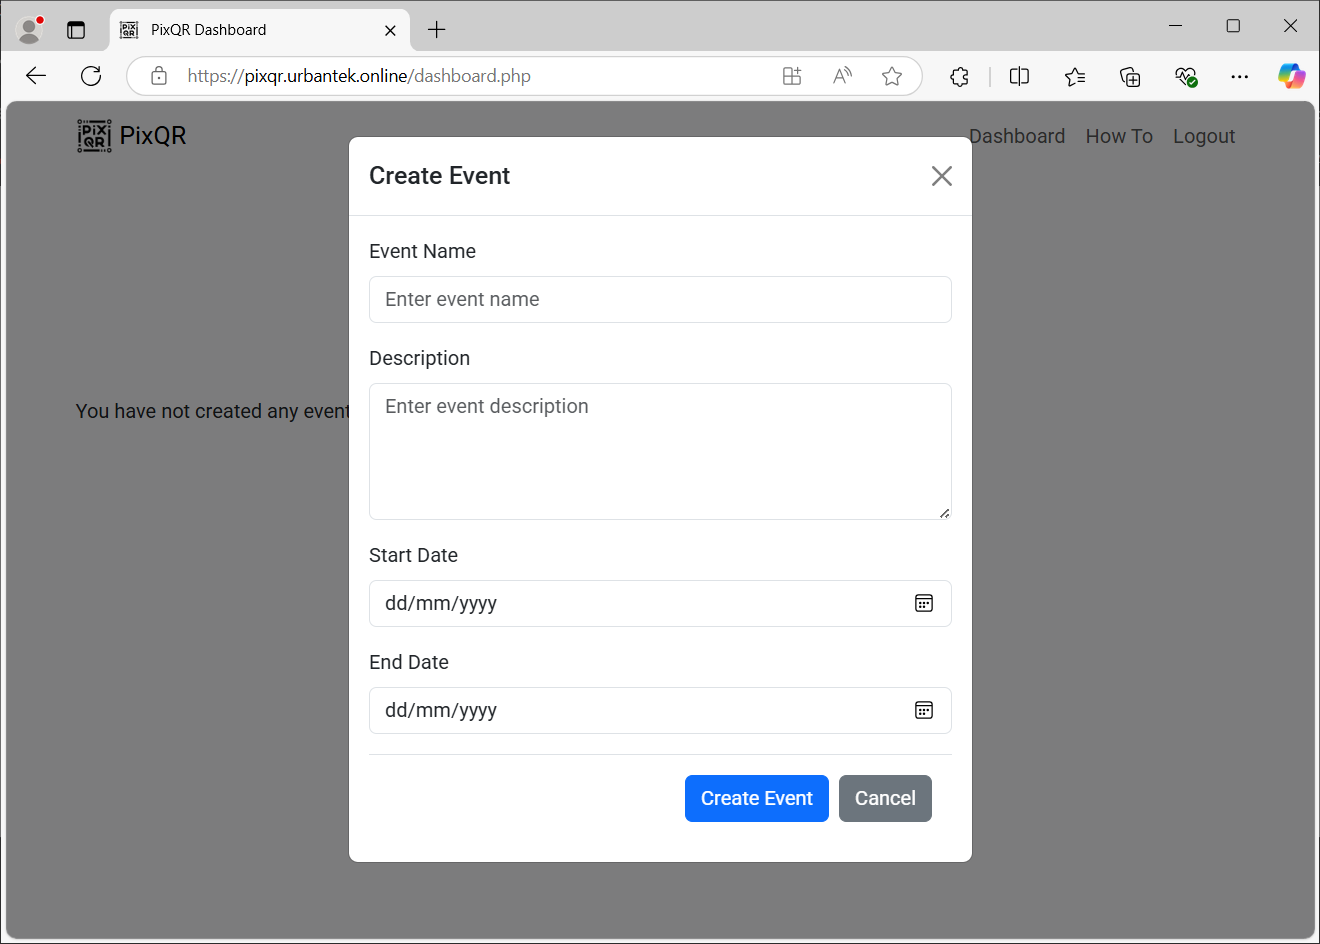
Step 1: Create an Event
Log in to your PixQR dashboard and click on the "Create Event" button. Fill in the details (event name, description, start date, and end date) to create your event. Once submitted, a unique QR code will be generated for your event.
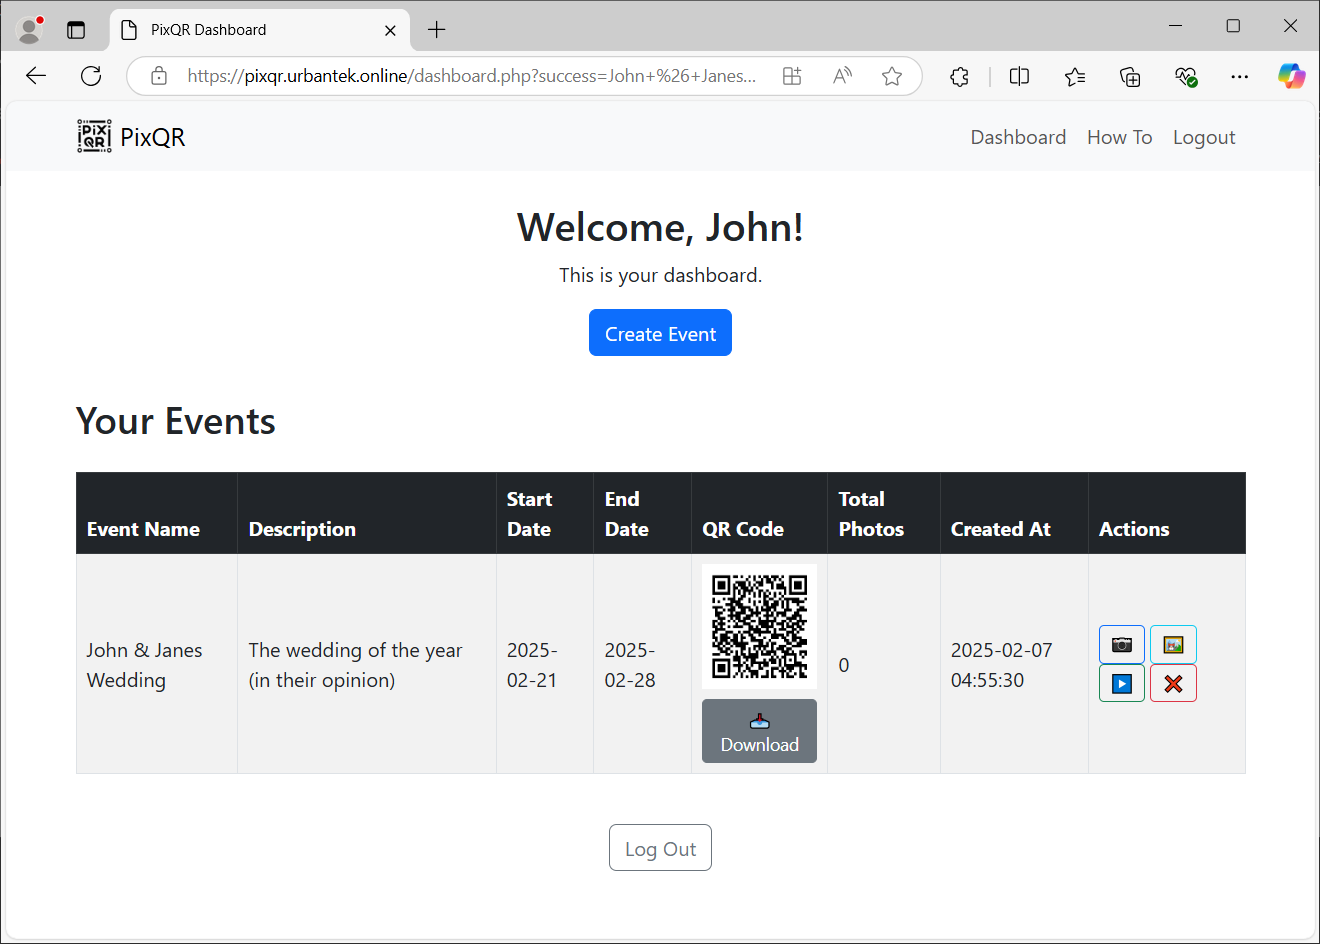
Step 2: Download the QR Code
After your event is created, locate the QR code on your event listing. Click the "Download" button under the QR code to save a high-resolution version. This QR code is what your guests will scan to access the camera page.
Step 3: Print the QR Code
Once downloaded, print the QR code in high quality. Place printed copies at each table or in strategic areas around your venue so that guests can easily scan them with their mobile devices.
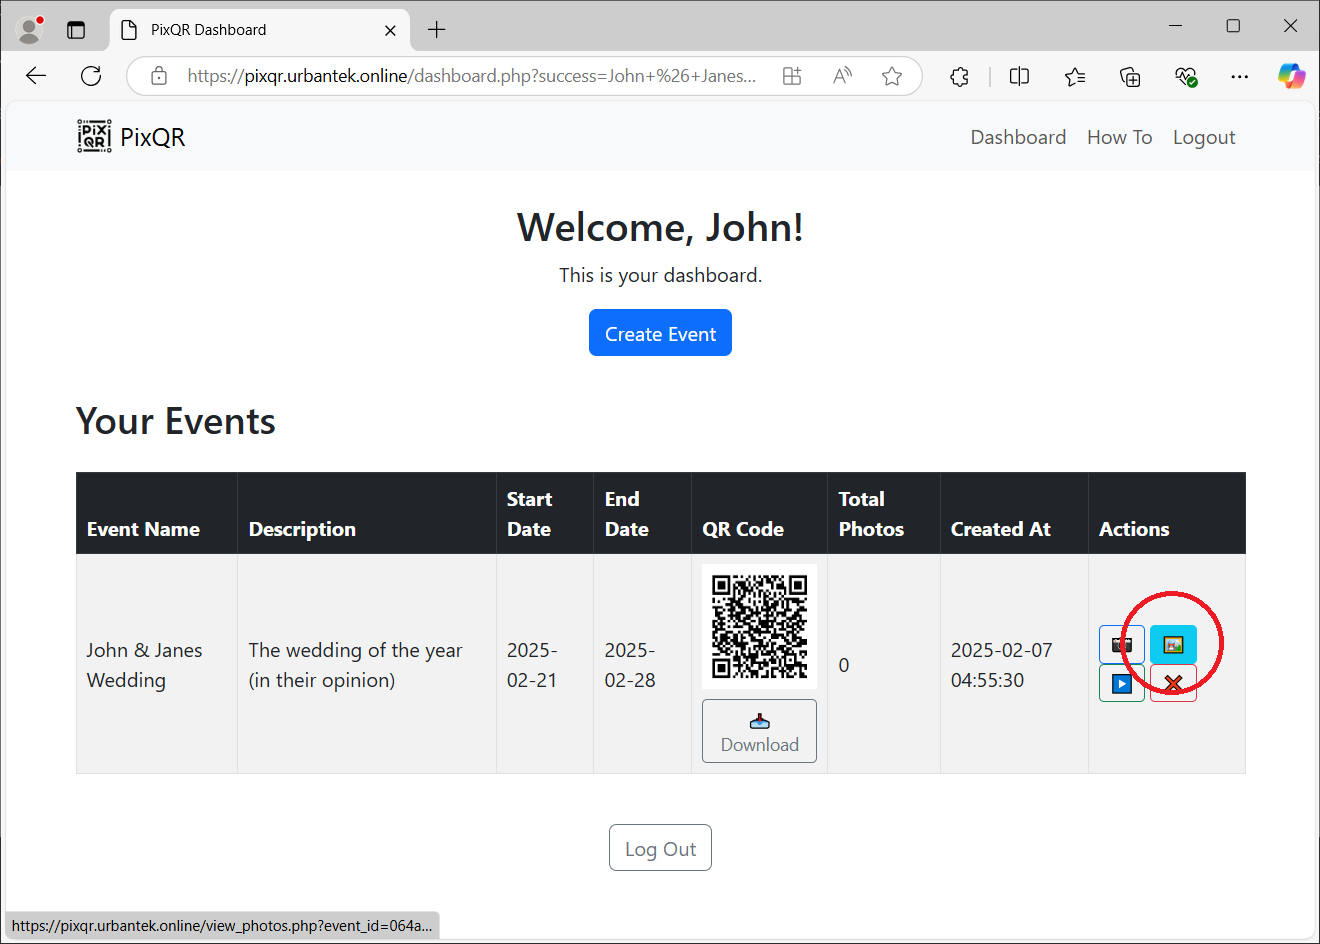
Step 4: View Event Photos
As guests take photos via the camera page, the images will be uploaded to your event. In your dashboard, click on "View Photos" next to the event to see all images displayed in a neat grid layout.
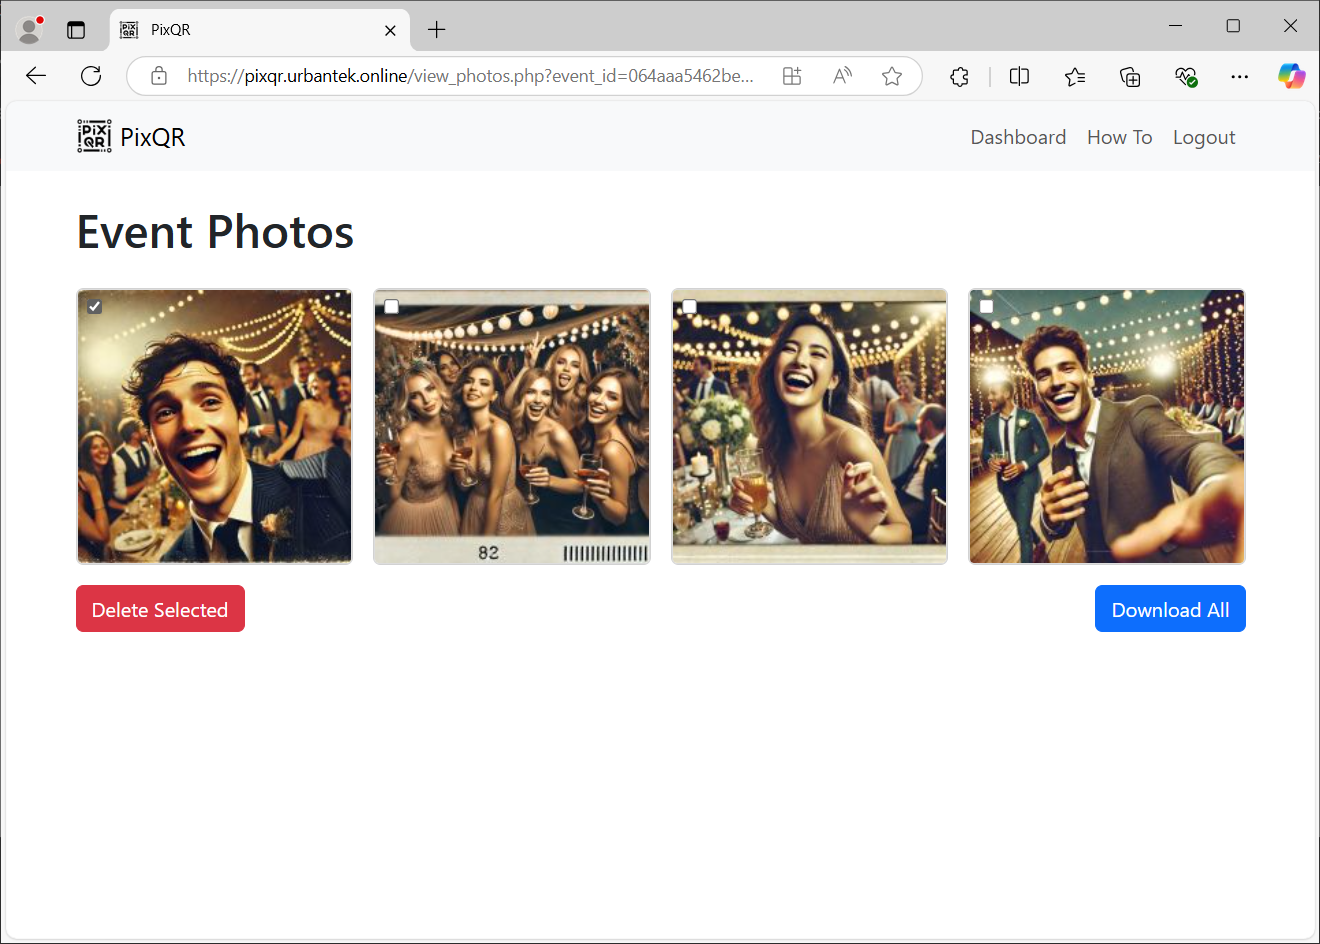
Step 5: Manage Event Photos
On the "View Photos" page, select images by checking the boxes overlaid on each photo. Use the "Delete Selected" button to remove any unwanted images. Alternatively, click the "Download All" button to download all event photos in one go.
Step 6: Use the Slideshow
To create an engaging display, click on the "Slideshow" button in your dashboard. This will open a full-screen, live-updating slideshow that cycles through all event photos every 5 seconds. The slideshow automatically refreshes as new photos are added.
